Modeling to Scale
In order to model something to scale, you first need the right tools to do so. For larger objects, things like tape measures and rulers work fine. But when trying to measure something smaller and more precise, a tool called a caliper works best. In this tutorial, I will show you how to use this tool to get precise measurements and turn them into a model that is to scale.
Step One: Deciding What to Model
- The first and most important step is knowing what you’re modeling. I recommend starting with something small that you can hold—something simple but not overly complicated.
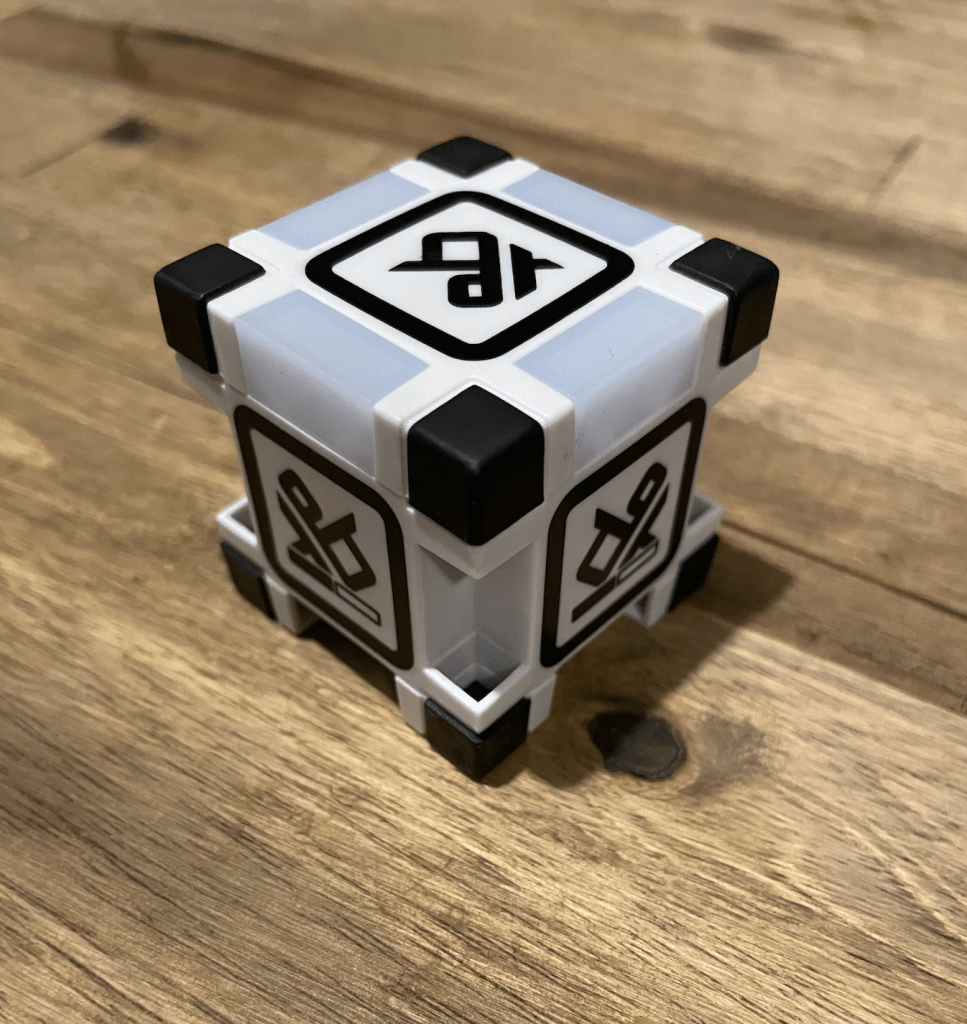
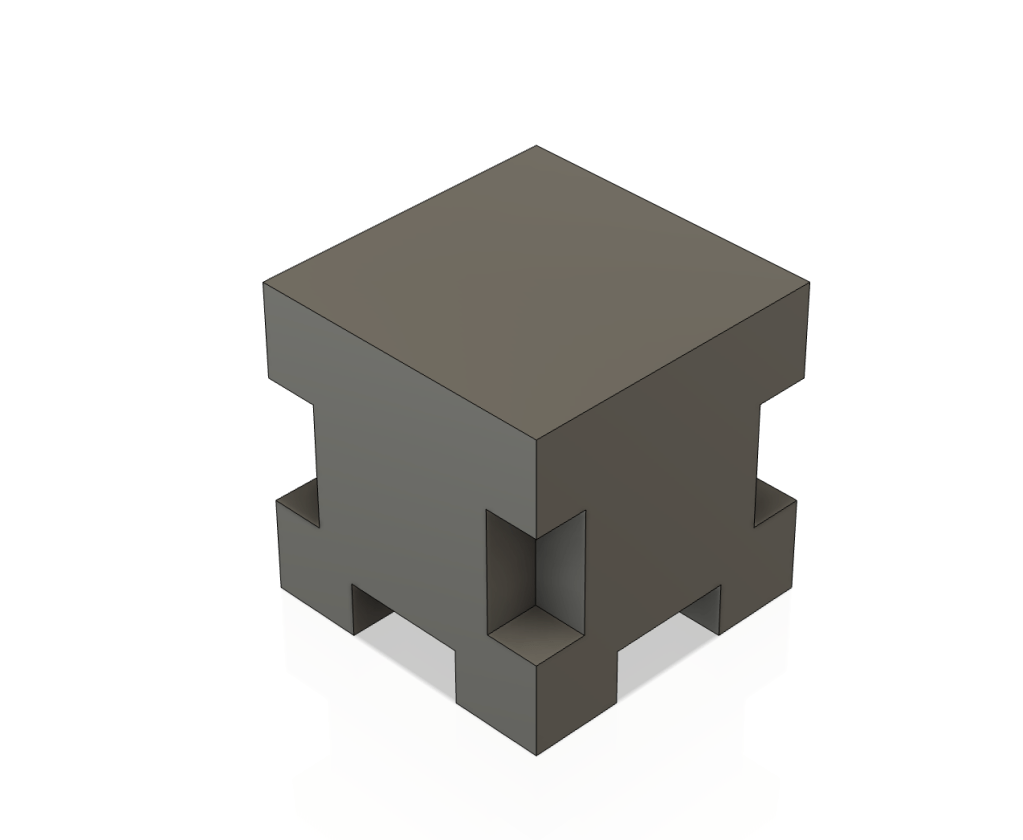
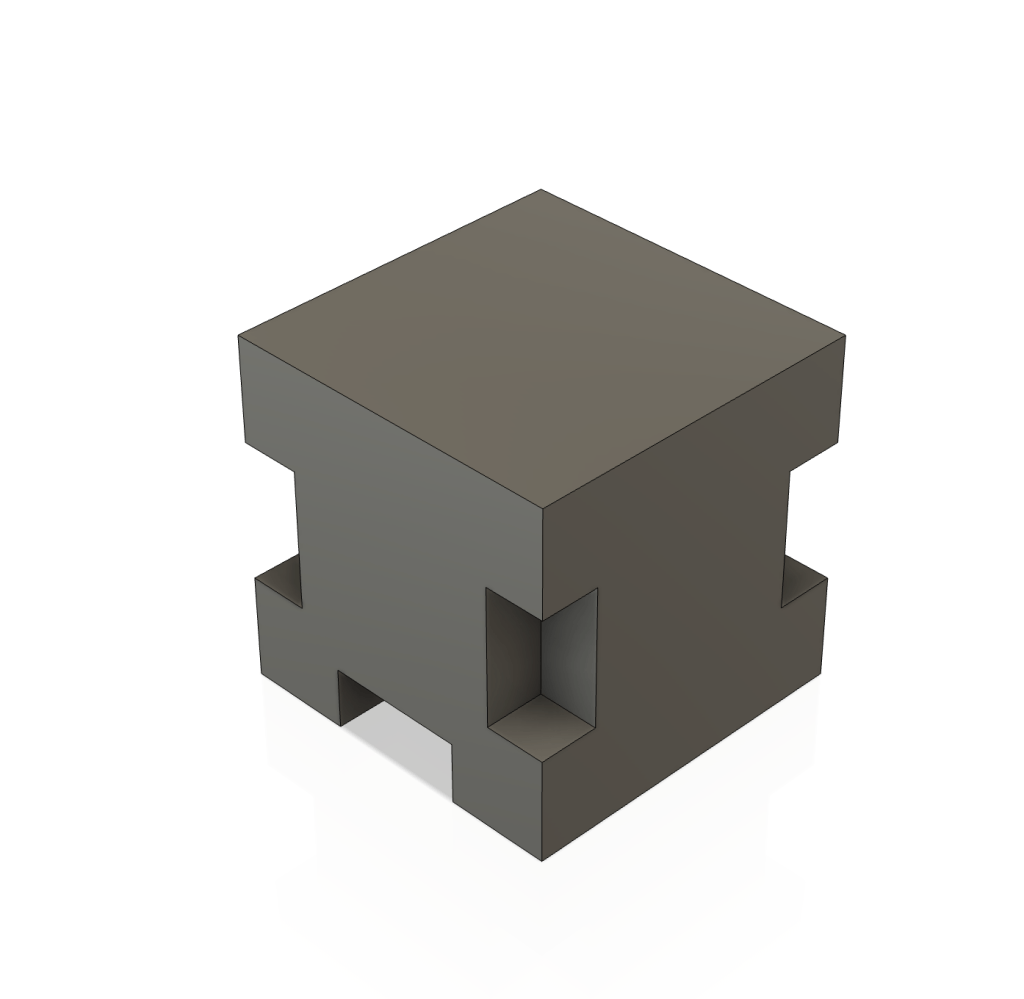
This is what I’ll be modeling in this tutorial: a small cube that is missing parts from each corner.

Step Two: Make Sure Your Caliper is Set Up Properly
- To use your caliper, you need to make sure it is zeroed properly. To do this, close the calipers completely and press the ZERO button.
- I’m working in millimeters (mm), but inches (in) also work.
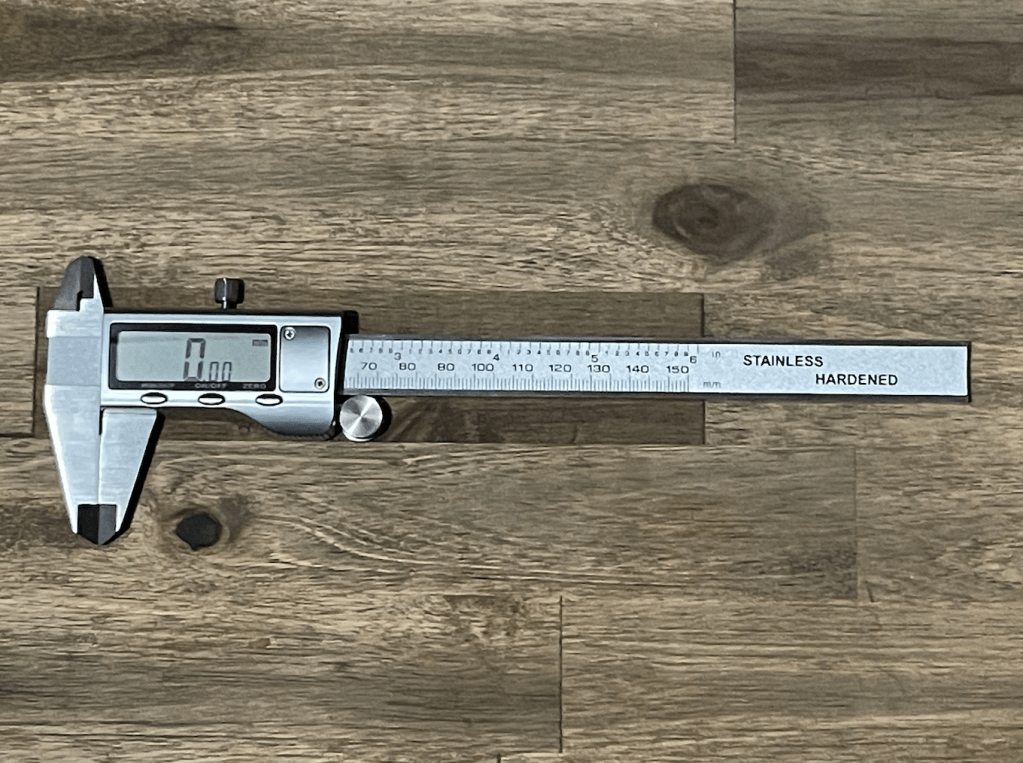
If your caliper is not zeroed correctly, it may look like this:
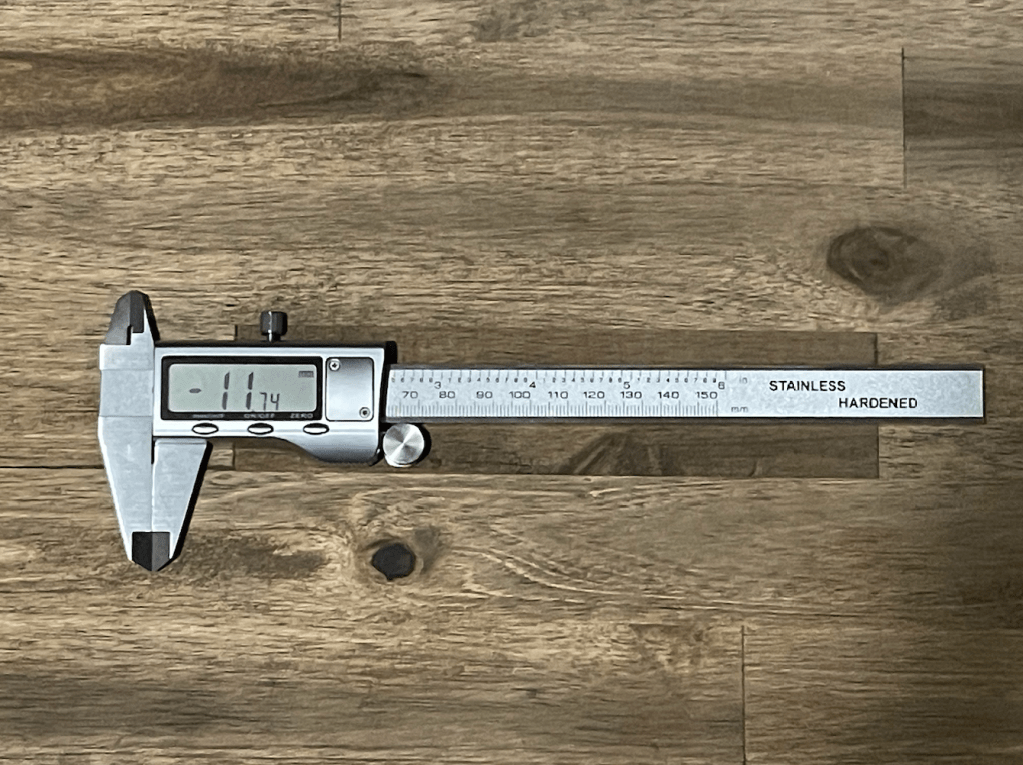
In this image, the caliper is closed but reading -11.74 mm. This means it needs to be zeroed. In this next image, it reads 0 when closed, which means it’s ready to use:
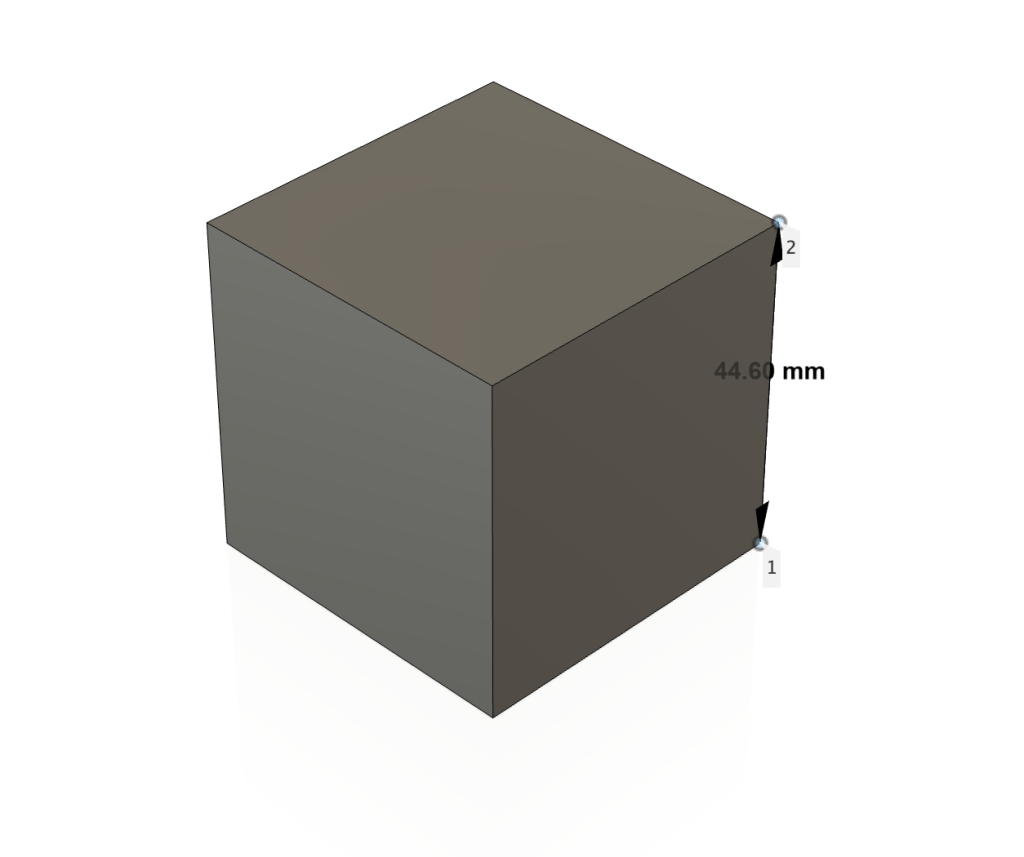
Step Three: First Measurement / First Model
- To start, I used my caliper to get the length, width, and height of one face of the cube. Then, I modeled that face in Fusion as a sketch.
At this point, I’m only measuring the main shape and will ignore the indents in the corners for now.
I opened the caliper just enough for the cube face to fit between the prongs, then closed it slowly until the cube stopped the caliper. The number on the screen is the measurement between the prongs.
My measurement was 44.60 mm for the length, width, and height—it’s a perfect cube.

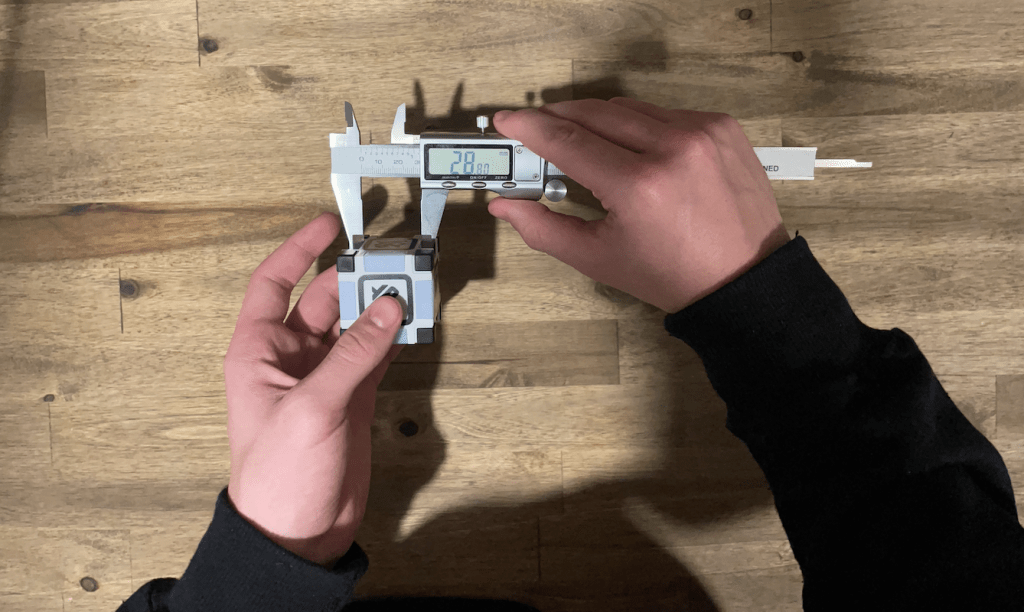
Step Four: Second Measurement
- Now I want to get the four indents on the sides. I’m going to do this by measuring:
- the distance between two of the indents,
- the distance from the top of the indent to the top of the cube,
- and the depth of the indent using the back prong of the caliper.
As you open the caliper, a long prong on the back extends—this is for depth measurements.
Because I’m working with a perfect shape, all four corners will be the same.
Here are the measurements:
- Distance between indents: 28.80 mm
- Distance from top of indent to top of the cube: 13.36 mm
- Depth: 7.77 mm

Another measurement and one of the most important parts of your caliper is the two points that stick out of the top. These can be used to measure the inter-measurement of things. I’m going to use it to find the distance between the top and bottom of the inner corners.
Thought I would not be using this measurement after this point.
Step Five: Using the Measurements
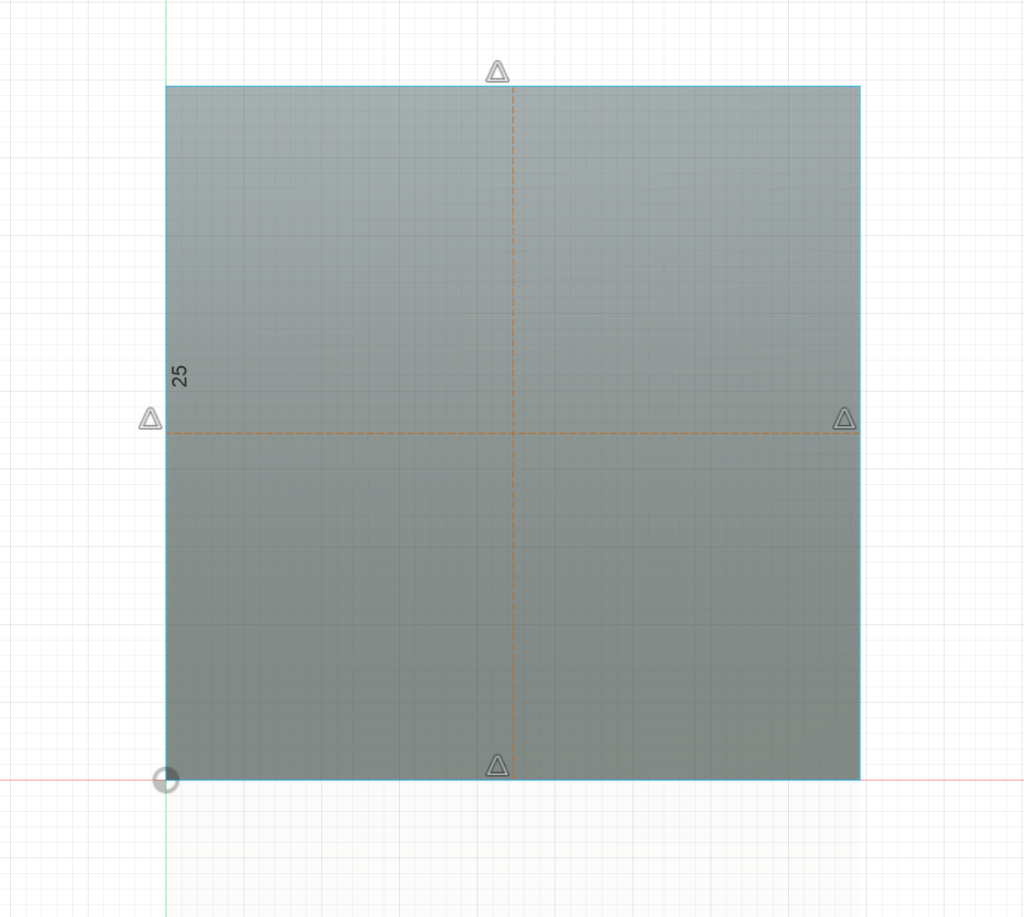
- Start by creating a new sketch on one of the sides, then use the Project tool to trace the face of the cube.
Then, using construction lines, create a cross in the middle of the square.
Now, using regular lines from the midpoint, extend left and right by half of 28.80 mm. In Fusion, you can type “28.80/2” and it will do the math for you.
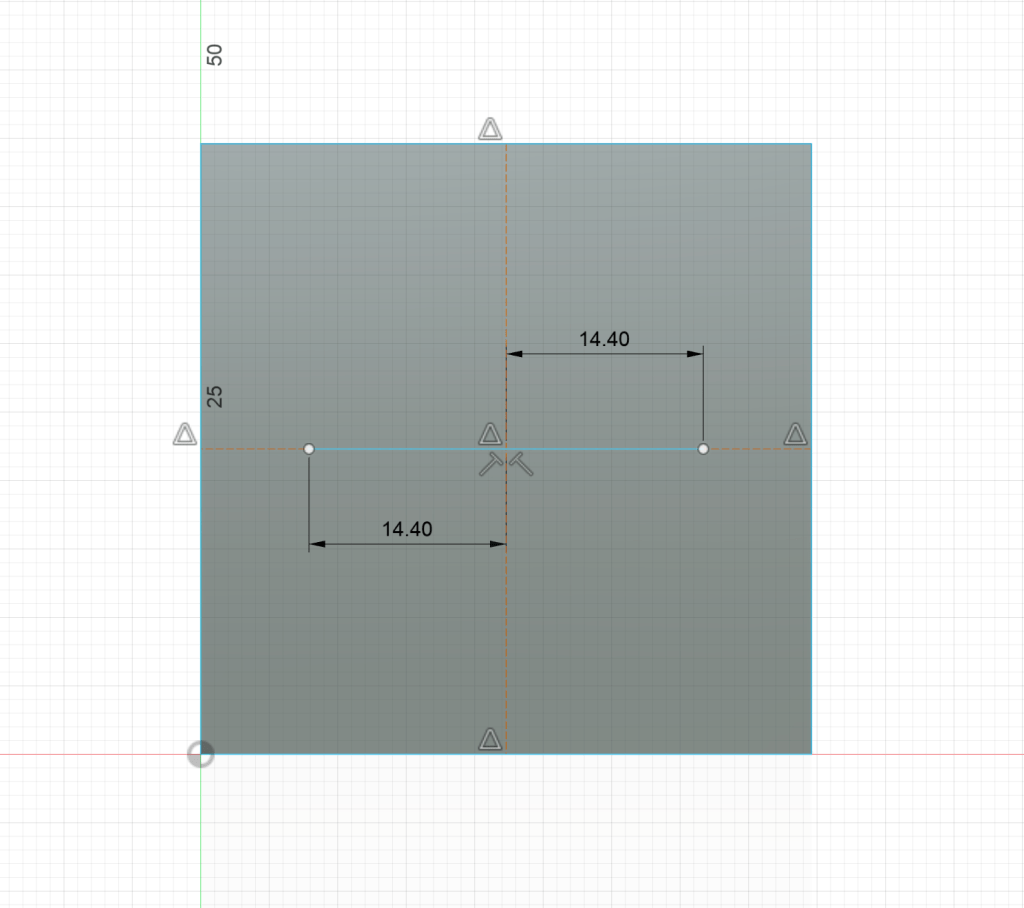
Make two vertical lines from the top to the bottom at the ends of the middle horizontal line.
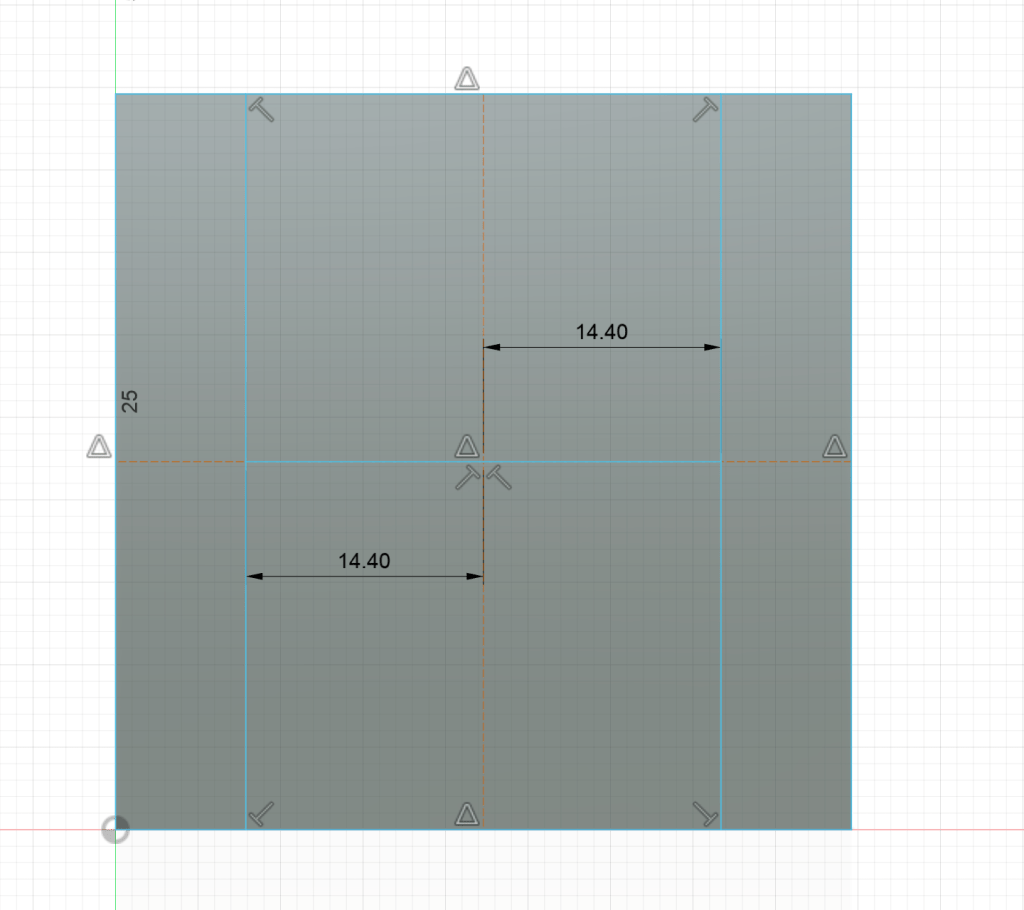
Then, from each of the four intersection points at the top and bottom, go down by 13.36 mm and draw lines to close that part of the square.

Since we know it’s a perfect cube, we can go ahead and model the bottom removed space as well by creating another rectangle with the same dimensions.
Step Six: Extrude
- Now that your sketch is finished, use the 7.77 mm measurement to negatively extrude the indent.

Next, create a construction plane in the middle of your shape using the Midplane tool. Then, use the Split tool to cut the object in half and delete the other half.
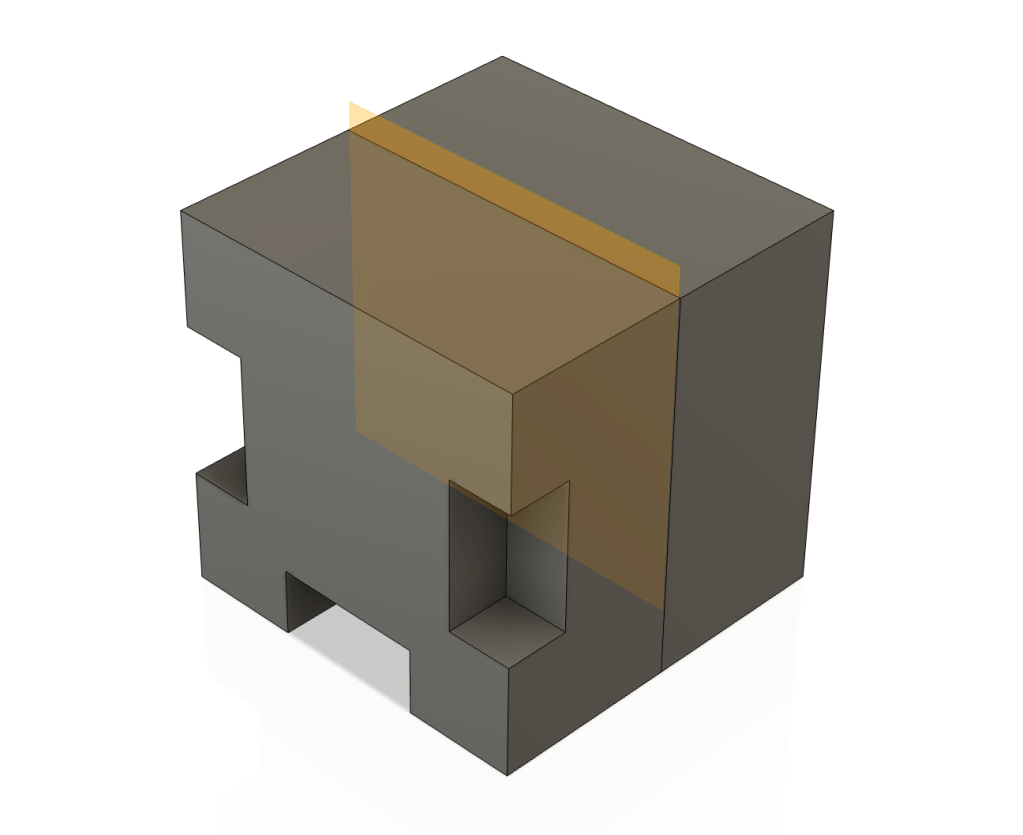
At this point, use the Mirror tool and the midplane to mirror the indent to the other side of the cube.
Step Seven: Time Travel
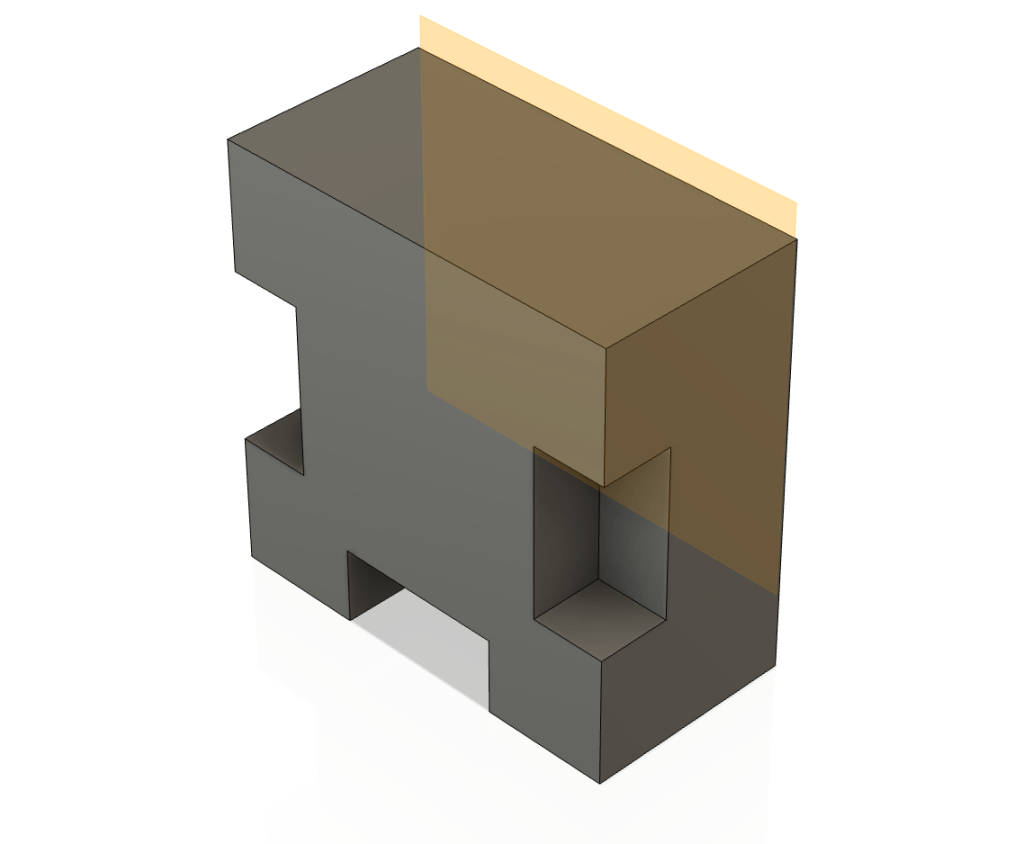
- We’re almost done! But we still need the holes on the bottom part of the other two sides. To do this, go back to the original sketch and add two new rectangles using the measurements you already know.
Final Thoughts
Modeling to scale can be very challenging and more complex than what we did here, but it’s also one of the most useful and rewarding skills you can learn. Keep practicing with increasingly complex shapes, and most importantly, have fun improving!