
Sketches
Probably the most important tool in Fusion is the sketch tool. It serves as the starting point for most models and is one of the most useful tools if you know how to use it properly. But what exactly is the sketch tool?
To create any shape in Fusion, you must start with a 2D version of the face you want to turn into 3D. For example, to make a box, you first need to draw a square, then use the Extrude tool to make it 3D. The process of drawing the square first is called creating a sketch. You do this for everything, and sometimes you may make something that doesn’t make sense in 2D but will later in the process.
So how does it work?
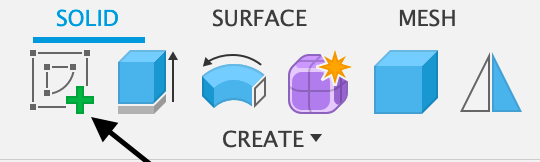
A sketch is a series of lines arranged to form a shape that can later be used to create a 3D object. It’s basically the same as drawing a shape on paper with a pencil. To create a sketch, you first need to enter the Sketch workspace. To do this, press the Create Sketch button on the toolbar and then select the plane you want to sketch on.
Doing this will provide you with many new tools, all with different functions, categorized into various groups:
- CREATE
- MODIFY
- AUTOMATE
- CONSTRAINTS
- CONFIGURE
- INSPECT
- INSERT
- SELECT
Each category has its own tools and uses, some of which you may never use, while others you will use all the time. For this reason, I will cover the most important tools, most of which come from the CREATE and MODIFY categories. Although every tool can be useful, most tools in the other categories are not commonly needed. Aside from the INSPECT and SELECT tools, which are quite self-explanatory, what do I do with these tools, and how do I use them?
CREATE
Simple Lines
Most tools do completely different things, but some are similar while still having different processes or outcomes. However, all of them edit or create the lines that 2D shapes are made of. By using different tools, you can create both complex and simple shapes that can later be turned into 3D objects.
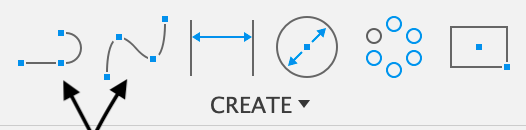
One of the simplest and most commonly used tools is the Line tool. It simply creates a line between two points, which allows for endless possibilities of shapes. One important thing to note is that when using the Line tool, your cursor will snap to certain points on both the grid and existing lines. This snapping feature enables you to create fully closed shapes easily.
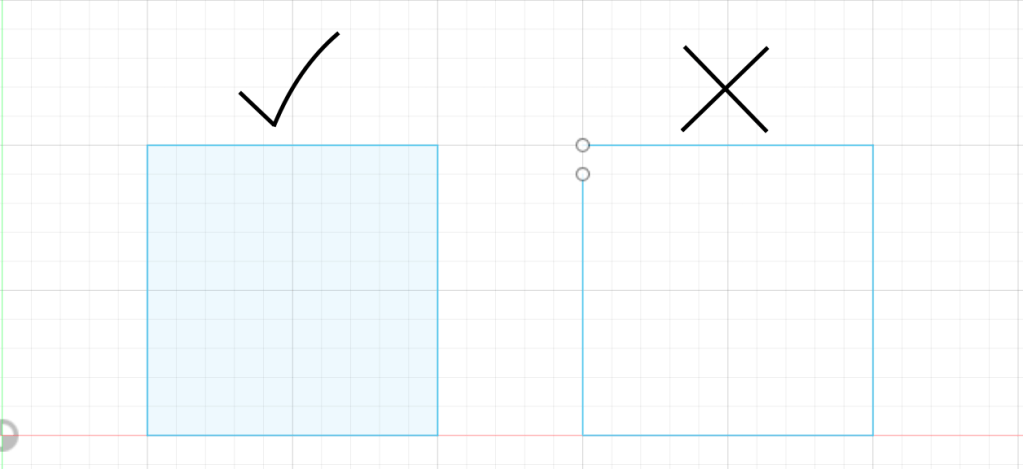
In the Solid workspace, only closed 2D shapes can be extruded. You can tell if a shape is fully closed if the area it encloses has a blue tint within the lines. If the blue tint is not there but the lines look connected, then it most likely means there is a small break somewhere that you just can’t see.
Your cursor might also snap to a point in the middle of an existing line, and you will know this is happening if a small triangle appears after it snaps.
Another tool similar to the Line tool is the Fit Point Spline. Like the Line tool, you plot points that are then connected into a line, but the key difference is that after the first two points have been plotted, the third will curve the line rather than make another straight line. After you have made your line, you can go back and use the point and the tangent line that will appear to edit the line’s curve if needed. This can be very useful when making something that might have a lot of curves, like an “S” shape or something more organic.
Basic Shapes
The Line tool has many uses and can be used to make almost every kind of shape. However, many other tools exist to create shapes faster and more efficiently. Getting used to these tools will make your work much quicker and more precise.
Rectangle Tool
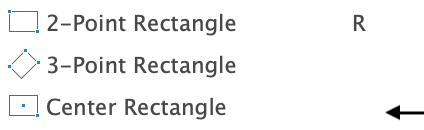
There are multiple types of Rectangle tools, each useful in different situations:
- Two-Point Rectangle: Select the first corner, then choose the opposite corner by either dragging your cursor or typing in measurements for the length and width.

- Three-Point Rectangle: Similar to the Two-Point Rectangle, you first create a baseline, then define the width.
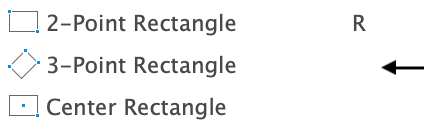
- Center Rectangle: Instead of selecting corners, you pick a center point, then place a corner. This ensures symmetry when placing a rectangle at the center of another shape.
Circle Tool
Just like the Rectangle tool, the Circle tool has multiple versions:
- Center Circle: Select a center point and then drag outwards to set the radius.

- Two-Point Circle: Select two points, and a circle is created between them.

- Three-Point Circle: Like the Two-Point Circle, but you define three points on the circumference.

- Two-Tangent Circle: Select two lines and a circle will be created that touches both.

- Three-Tangent Circle: Similar to the Two-Tangent Circle, the circle will touch three lines instead of two.

Other Tools in CREATE
- Mirror: Select the lines you want to mirror, then choose the line or axis you want to mirror across. The selected lines will be copied and flipped.

- Circular Pattern: Select the lines or shapes you want to repeat, then choose a center point. You can increase the number of copies to form a circular arrangement.

- Rectangular Pattern: Similar to the Circular Pattern, but instead of repeating in a circular shape, it duplicates objects in a grid pattern along the X and Y axes.

- Project: Converts the edges of an existing 3D object into a 2D sketch. This is helpful when trying to modify or add features to an existing shape. Projected lines appear in purple, but if you uncheck the Projection Link box, they turn into real sketch lines (blue).

MODIFY
Fillet & Chamfer
The MODIFY category is for changing, editing, or removing existing lines rather than creating them. Two of the most useful tools in this category are Fillet and Chamfer:
- Fillet: Rounds off a sharp corner with a smooth curve.

- Chamfer: Cuts the corner at an angle instead of rounding it.

These tools are great for making corners look more refined and professional.
Offset & Trim
Two of my most frequently used tools in the MODIFY category are Offset and Trim:
- Offset: Creates a copy of an existing line at a set distance, useful for making parallel lines or adding layers to a design.

- Trim: Deletes only the portion of a line that extends beyond another, making it much easier to clean up a sketch.

Final Thoughts
Fusion has hundreds of tools, and I have only covered a handful in just one part of the software. When making something new, try learning a tool or two at a time—trying to learn them all at once can be overwhelming and make the experience much harder.
My biggest piece of advice: have fun and experiment with new tools! The more you explore, the easier and more enjoyable Fusion will become.
